Guide: Cleaning Your Central Air Conditioner

Guide: Cleaning Your Central Air Conditioner
Cleaning your central air conditioner regularly is important for many reasons. It helps extend the life of your air conditioner by reducing wear and tear on parts by allowing your machine to run more efficiently. Giving your air conditioner regular attention also means you are more likely to catch small problems, so they can be dealt with before they worsen.
Most central air conditioners consist of:
- A condenser (which is made up of the compressor, the cooling tubes, and a fan)
- An evaporator (which is responsible for cooling the air.)
- Tubes to drain the moisture pulled out of the dehumidified air
- A fan to blow cool air into your home
You should clean your central air conditioner twice per year, and have it inspected by a professional at least once per year. Though regular cleaning can help extend the life of your unit dramatically a professional will be able to spot, diagnose, and fix any problems that arise.
Before you begin cleaning your central air conditioner, you should make sure it is powered off. The power switch is probably located near the condenser unit and should consist of a square box mounted on the wall. Inside the box, there should be a switch, which you should turn to the off position. If there is no switch, you will need to unplug the unit. You should consult your owner’s manual before you begin, and take note of any special instructions from the manufacturer.
Cleaning Your Condenser
Now that your central air conditioner is turned off or unplugged you can begin cleaning it.
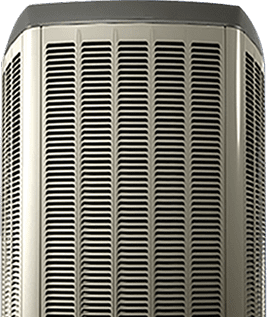
Step 1: Vacuum your condenser fins. The fine, narrow slats of metal located on the side of your unit are called fins. These can be cleaned using the nozzle attachment for your vacuum cleaner. Make sure to remove any large pieces of debris (such as twigs or leaves) before you begin vacuuming. A shop-vac (which can handle both wet and dry debris) is best suited for this task. If you don’t have a shop-vac, you may be able to rent one from your local hardware store. Though you can use your regular household vacuum cleaner for this job it may damage your vacuum, so proceed with caution.
Step 2: Straighten any bent condenser fins. The condenser fins work best when they are straight. However, normal wear and tear may cause them to bend. You can straighten bent fins using a butter knife or similar kitchen utensil. Slowly insert the knife between the fins and apply steady, gentle pressure to straighten the fins. If you use too much force, you may damage your fins further or snap them off entirely. If you can’t straighten your fins on your own, you should call in a professional.
Step 3: Unscrew and remove the fan. The fan should be located on top of the compressor and is likely covered by a wire safety grate. Use a screwdriver to remove the protective cover, then unscrew and remove the fan unit. The fan is connected to the compressor using wires, so you may not be able to remove the fan entirely. If this is the case simply move the fan as far away from the rest of the unit as possible.
Step 4: Wash the fins and fan blades. Use your garden hose to rinse away any debris, such as leaves, pollen, dust, or grass from the fan blades. Once you have removed as much of the debris as you can wipe the fan blades with a clean rag or cloth. Spray water through the compressor fins to clean them, Make sure you are spraying from the inside, so that any debris is washed away from your unit instead of into it. Cleaning the fins will help ensure that they don’t become obstructed, which can restrict airflow.
Step 5: Wait for the components to dry and then reassemble the compressor unit. Now that everything is clean and dry you can reassemble the unit. Set the fan back in place and reinsert the screws that hold it to the metal frame. Then, put the metal safety grating back in place. You may now turn your air conditioner back on.
Cleaning Your Evaporator
Once your compressor unit is clean, you can turn your attention to the evaporator.
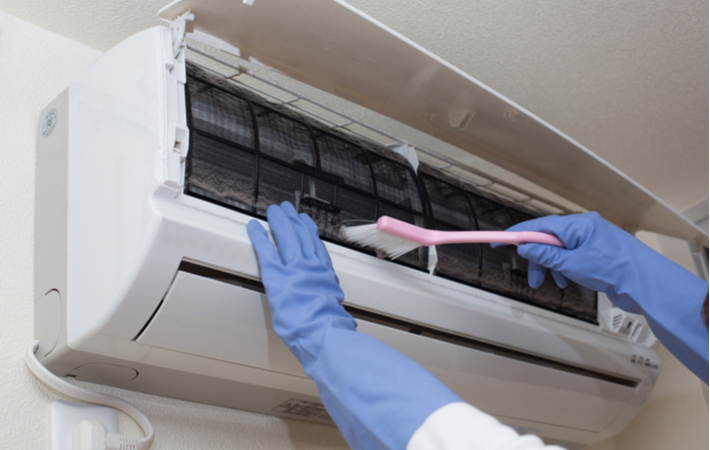
Step 1: Determine what sort of air filters you have. Your air filters should be replaced or cleaned at least twice per year. Whether your air conditioner requires new filters or comes with washable and reusable filters, will be laid out in your owner’s manual. If you aren’t sure if your filter is reusable or not take a look at the material. Disposable filters are made of a thick, paperlike material while reusable filters consist of a metal mesh surrounded by a rubber frame.
Step 2: Remove your air filters for cleaning or replacement. Remove the metal grate covering your filter, then swap out the filter for a new one. If your air filter is located inside your home, you will likely find it close to your evaporator unit. If you are not able to locate your air filter consult your owner’s manual. Over time your air filter becomes dirty and clogged. This impedes airflow, which can decrease your unit’s efficiency and put additional strain on other components.
If your unit uses reusable air filters, they should be washed thoroughly twice per year. Consult your owner’s manual for specific instructions. However, most reusable filters can be cleaned by running them under lukewarm tap water and scrubbing them gently with dish soap.
Step 3: Clean your drain and hose. Your air conditioner works by pulling warm, moist air in, pulling the heat and moisture out of the air, and then blowing the cool, dry air into your home. The water that is drawn out of the air is typically channelled through a thin plastic pipe to a drain in the floor. Cleaning your drain and hose ensures that any debris that ends up collecting there does not cause a clog. You can clear your drain and pipe using a stiff wire. Run the wire through the flexible plastic pipe to check for clogs. Then, run the wire down the drain to check for clogs.
Some more modern units feature a pipe that runs right down into the floor, bypassing the need for a drain. If this is the case with your machine, you do not need to worry about cleaning it.
If at any point you notice water pooling around the base of your air conditioner or notice freshly water damaged tiles nearby, you should call a professional, or your landlord, immediately.
Step 4: Keep the area around your condenser clear. Though you may be tempted to hide your condenser it needs to be surrounded by open space to function properly. Vines, shrubs, or weeds should not be allowed to encroach on your unit’s space. Your condenser unit needs about two feet of space on each side, which will ensure there’s plenty of free-flowing air that can reach your condenser. In the fall you should also take the time to rake any fallen leaves that have gathered around your condenser.
While regular cleaning is an essential component of maintaining your central air conditioning unit you should still have it inspected by a professional at least once per year. If you can, schedule your professional inspection in the spring. This will help ensure that your central air conditioner is working at peak efficiency when the hot summer months roll around. A professional will be able to further disassemble your unit during their inspection and determine if your air conditioner requires any repair work.